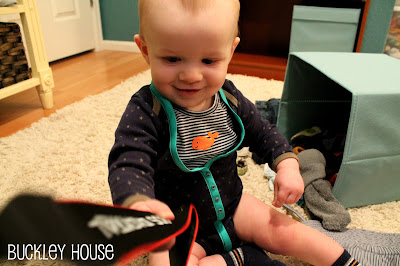
Vests and cardigans are my top choice when I want to put the Babe in something cute. People joke that all we need to add are a tiny pipe and a glass of scotch to complete the baby-gentleman's ensemble. Little J prefers a pacifier and sippy cup of apple juice, so we'll stick with that for now.
Correct me if I'm wrong, but I don't believe major retailers carry onesie cardigans... so I've been making my own!
I'm by no means a sewing expert - I like to employ a "trial and error" type of method when completing projects. You'll see...
When the Babe was younger, I found a picture online of an adorable baby romping around in a cardigan onesie. And I wanted it! (the cardigan, not the baby) This was my first attempt at recreating the classy outfit:
 |
| I don't always pose for photos... but when I do, I work it. |
I started with a $1.49 onesie from Goodwill (washed and tag removed).
 |
| I didn't use this binding after all. It was the wrong kind :( |
Step by step:
1. Find the overlapping fold on the shoulders that is meant to help baby's huge noggin squeeze through the neck hole. Pin and sew shut. (Not all onesies have this).
2. Find the middle of the shirt. Mark this spot and cut from top to bottom on the front.
*TIP* This time I left the part with the snaps intact. They are a pain to sew around, and I always end up sewing the cardigan shut anyway, so I didn't cut my opening the whole way down the front of the shirt after all.
3. Cut the "V" in the neckline. I folded my shirt so I could cut both sides at once and keep them symmetrical.
4. Pin binding to edges. I used is double-fold binding, but I got lazy and did not attach it in the "proper" way. I recommend avoiding the lazy path (slap me on the wrist) and doing it the right way. Here's a tutorial on how to attach binding the correct way. You'll see why...
I attached my binding right over the original binding of the onesie. I've also made cardigans where I cut the original binding off first, but these don't tend to fall as nicely or retain their shape as well. It's personal preference, really.
The bottom (where I left the snaps intact) was where I folded the binding under for a clean edge.
5. Sew binding in place. Because I took a stupid shortcut, my stitch missed sections of the binding on the underside. Boo... So I had to sew two rows of stitching to fix my boo-boo.
6. Pin cardigan closed and arrange buttons. If you enjoy sewing buttonholes (gross) go for it. But since this will be worn by a baby who doesn't care, I just sewed the whole front shut and added buttons purely for visual interest.
7. Enjoy the finished product!
This onesie is still a little big for my tiny guy (hence the strange gaping). And Little J was not focused on the task during his photo shoot... So I took whatever photos I could get!
 |
| Rascal... |
Click here for my tutorial on how to make these baby leggings!


No comments:
Post a Comment