Friday, August 30, 2013

Heating and Cooling Pad

Pregnancy makes the body hurt.  I mean the whole body sometimes.  This pregnancy has granted me the gift of frequent, knock-me-out headaches.  I've never been a migraine sufferer, but these bad boys are as horrible as I have always imagined migraines to be (not to mention, nearly as incapacitating! Jared will back me up on this one).

One piece of relief that I have discovered after much trial and error: icing my neck and head.  This tells me that my headaches might be tension-related... but the only thing remotely resembling an ice pack in our house is a really old bag of frozen corn that Jared and I have both used as an ice pack enough times that I'm sure the corn isn't possibly edible anymore.  It has worked for the most part, but really isn't big enough to span the entire back of a pregnant lady's neck.  I have made "heating pads" in the past, using rice, and I figured the same concept can be used for a cooling pad. 

My past heating pad projects were extremely time-consuming, frustrating and not all that successful.  But I did learn a few things that made this project a little bit easier.

Firstly, I actually measured my fabric. This is a step that I often (gasp!) skip entirely.  Lazy! I ended up cutting these to be 8x18 inches.  I cut 2 pieces of an old T-shirt for the lining, a piece of soft fleece for the back and a piece of pretty cotton for the front.  This will allow for one side to be warmer or cooler than the other side, based on temperature preference. 


I sewed my lining first, like this: (leaving one whole side open for filling with rice).  I didn't bother measuring the spaces, but just eyeballed to make sure they were somewhat evening spaced out. 


Then I filled each space with rice.  I filled the spaces about 3/4 of the way full (maybe slightly fuller) so that the pad would lay nicely on my neck.  This made the final sewing step a little trickier, but it's totally worth it. I taped a piece of printer paper into a makeshift funnel (because, strangely, we don't own a real one).  I used the cheapest, regular old white rice I could find at the store.


Then I sewed up all the openings so each rice space became a nice little rice pillow.


The final sewing step was pinning and sewing all the layers together.  I pinned them in this order:

Top: Fleece, "pretty" side down
Middle: Cotton, "pretty" side up
Bottom: Rice-Filled Lining.  Since this is an interior layer, I don't really care what it looks like.  So there is no "pretty" side :)

Then I sewed the border, making sure to catch all three layers and leaving a decent sized opening for turning right side out.


Once I turned it all right side out I stitched up the opening.  And done!


Jared is out of town today, and my only other human model wasn't being very cooperative...


So I asked an old friend to step in... I actually think his head is slightly bigger than mine, so he was a perfect model.


Saturday, August 24, 2013

Goodbye Summer: Felt Flower Coasters

We're getting to that time of Summer when the heat feels out of place.  I start to get that itch to wear scarves and long pants and snuggle up under a blanket with some hot tea, but the days are still too hot!

And now that pregnancy hormones are preventing my body from regulating its temperature in a normal (sane) way, I'm really ready for some cooler weather.  I can't wait for that crisp, cool edge that Fall breezes carry over your face.  Or the cinnamon and pumpkin scented candles that I have stored with my Autumn decor.  Or, most of all, that delicious, satisfying crunch! of stomping on dried up fallen leaves.  Mmmmmm....

I made a decision yesterday that it was time to give Summer a little hint that I'm ready for her departure... so I made some "farewell, Summer" coasters:


These little babies were super easy and, even though I was sloppy and rather lazy in my cutting and sewing, they turned out pretty cute.

I am a sucker for felt.  I don't know why... maybe it's the HUGE variety of colors, textures and patterns available on that long Hobby Lobby aisle.  But I just never can resist.


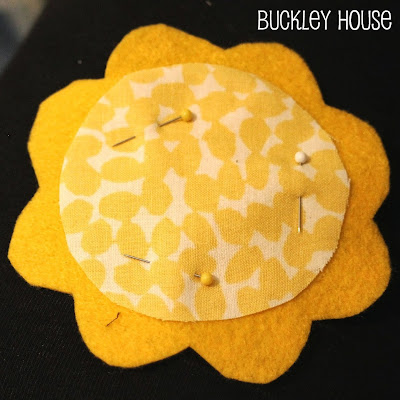
So I picked out some cheery colors, doodled up a pattern design and cut my felt.  Felt is awesome for this kind of (lazy) project because it doesn't fray.


I then found some matching cotton fabrics.  This will help to actually soak up the spills/condensation since felt isn't very absorbent...


Since my cotton fabric will fray, I sewed a very tight zigzag edge around the perimeter of the circle.  This is the easiest (laziest) way to do an applique.  And it works fairly well.


I literally conceived, started and finished this project within a single nap time.  These coasters won't hold up nearly as well as my Leaf Coasters have, but they were so easy that I can easily make replacements if necessary.


notice my new water bottle? mmmm...


Friday, August 23, 2013

Gender Reveal

It's a BOY!

Our sweet Little J will have a baby brother in January!  We can't wait to see what great pals our boys become and look forward to watching them play together and grow together.  

Even though we were hopeful for a baby girl, we know that any baby we get to bring home is going to be special and unique and loved so much.  And, no matter what, a baby is a blessing. 

Our busy little household will be nicely balanced with 3 boys and 3 girls (Jared informs me that the dogs count... so if we buy a boy dog, the next baby will be a girl by his logic. Haha).  I will just keep crossing my fingers at this point that we eventually have a girl without ending up having quite as many boys as the Weasleys...


Wednesday, August 21, 2013

Easy Scrap Bibs

This week has been rough on my little family, but I promised to limit my complaining, so I'll keep it simple:  Sometimes the bad things in life arrive strung neatly together like little, horrible pearls with barely any space between them. 

We have been desperately looking forward to this monumental week in my pregnancy (it's ultrasound week, people!!!) This is the week that we will receive confirmation of our baby's health - and almost as importantly, we will discover whether Baby Number Two is a boy or a girl!  The anticipation has been almost unbearable.  I told Jared on Saturday, "we just have to make it through the next few days... then the ultrasound appointment will be here!"  Those simple words cursed us...

I won't go into detail about the week's misfortunes (and trust me, there are some details you really don't want to hear about).  But the saddest, most upsetting event of the week was the demise of my fancy, expensive DSLR camera lens at the hands of my sweet, seemingly innocent 14-month-old baby.  It truly was a freak accident, but the grief I felt at this loss sent me into a tailspin of pregnancy emotion that I wallowed in for far too long.  I had to remind myself that, "it's an inanimate object," and, "it can be replaced," but sometimes those words just don't have what it takes to make you feel better (especially when the cost of replacement is roughly $200 that doesn't exist in your budget). 

After I recovered somewhat from the shock, I pulled the last few pictures off of my memory card and realized that I had documented a fun project last week!  Replacing the broken and worn out has been a running theme in our house lately, and I've honestly been doing all I can do to ease the impact it has had on our budget.  So when I decided that all of Little J's yellowing bibs were too gross to use any more, I dug into my scrap fabric and came up with a little something.

Although a little girly, these fabrics coordinate nicely

I sewed my strips of scrap fabric together, making sure that the overall surface area would be big enough to serve as the face of my bib.


I used one of Little J's bibs that fit nicely as a template (tracing around it on paper).  I had to make the neck hole slightly bigger, since my scrap fabric doesn't have any stretch to it.


I cut some coordinating fabric to serve as the back of my bib, pinning it "pretty sides together" with my sewn strips.  I then pinned my pattern to the fabric (I could have just traced around the pattern, which would have been easier, actually).

 
And sewed along the edge of the pattern, leaving a hole for turning right-side-out.


Once finished sewing, I cut around my stitching.  I also snipped carefully around the curves to allow for a smoother look once turned.


Then turn!


I like to close up my "turning hole" by sewing a border around the entire bib - this way my closing seam is disguised.  This also keeps the bib nice and flat (no bubbling or weird poofing).


Here's a back view :


And here is my adorable model:


I cropped out the enormous booger that was in his nose. You're welcome!

Wednesday, August 14, 2013

Second Time Around Makes Me a... Pro?


I want to believe that, because I've already been through the pregnancy, labor, childbirth, newborn experience, I'm a professional.  That I learned all the lessons I will ever need to learn and made all the mistakes I will ever have the misfortune to make.  But I know deep down that I am horribly, terribly wrong.

I've already been shown that I'm not a Pro when it comes to pregnancy - this time around has been entirely different than the first time.  Everything I expected to happen, hasn't happened!  And everything I figured wouldn't happen, has.  I'm a list person, so here's how my mind makes the comparison:

Baby J Pregnancy:
  • Got pregnant right away with no problem
  • Had moderate morning sickness
  • Had nasty, mean mood swings in the first trimester, which diminished after about 14 weeks
  • Had no real food cravings
  • Knew in my heart that Baby would be healthy and that everything would go smoothly 
  • Gained a reasonable amount of weight 

Baby #2 Pregnancy:
  • Struggled to get pregnant, thought something was wrong, saw doctor, then SURPRISE!
  • Had almost nonexistent morning sickness, but extreme fatigue
  • Have had the saddest, sobbiest mood swings that are only worsening as pregnancy progresses
  • Have had the ugliest skin and hair of my life
  • Have had no cravings because I've had no appetite?!?!
  • Have gained practically no weight at all
  • Have this deep, sinking feeling of doom that something horrible is going to happen to me or the baby or somebody important in our lives
So this pregnancy has really thrown me for a loop.  People keep telling me, "it's probably because you're having a girl!"  But realistically... there could be any number of reasons for all the distinct differences between my pregnancies.  I'm pregnant during the summer, for one.  And I have a 1-year-old I'm chasing around while still carrying most of the baby weight that I gained while pregnant with him...

Right now I'm just so thankful that my pregnancy is progressing healthily and normally.  But the fact that there has been so much of the unexpected this time makes me think that the surprises might continue indefinitely.  Just to be safe, I will plan ahead as though I know what's to come.  Meaning: I will firstly try to correct all the mistakes I made the first time!

While pregnant with Little J, I did a really good job of staying relaxed, calm, and happy.  Really, the only mistake I made leading up to his delivery was not getting enough exercise.  I haven't been a very good girl this time either, but I do have my little toddler to chase around, which keeps me from being a total couch potato at least.

Where I went the most wrong with my first pregnancy was during our hospital stay - from the time we checked in until the time we checked out.  I consider myself to be flexible and resilient most of the time, but I was pretty unfair to myself to think that I could make it through labor, delivery and recovery by simply relying on whatever amenities the hospital would provide.  During my (27 hour) labor, I listened to the in-house hospital music loop instead of the iPod resting comfortably in my suitcase.  What?! Why?  Who knows, really...  But this was one of so many mistakes that made the hospital experience less than enjoyable for me.  Here are my suggestions to Future-Sarah for the next hospital stay:

  1. BRING YOUR OWN PILLOW!
    - I cannot stress this enough.  You will really need a piece of home once you are alone in the recovery room. 
  2. Listen to your own music during labor.  Nothing is more soothing than James Taylor.
  3. Take a shower as soon as you can.  Seriously.  But just in case you resist, pay Jared ahead of time to use whatever force necessary to get you in the shower.
  4. Bring some of your own jammies and socks from home.  And a robe.  And some big, post-birth undies.  Hospital clothes are NOT comfy.  Also, put a bra on as soon as you are allowed.
  5. Order tons of food at mealtimes.  Your food is included in the hospital costs, so why not eat as much as required to fuel your milk-producing body?
  6. Force Jared to eat and sleep as much as he needs to.  A zombie husband is not very happy or helpful.
  7. Be assertive with the nursing staff.  They will give you contradicting advice about breastfeeding.  And there will be a time when you need to just push the stupid call button and ask for assistance.  Don't be such a weenie!
  8. Write things down.  Your feeling, your thoughts, observations about Baby, and most importantly: information you might not remember after the baby-haze wears off.  Don't assume you or Jared will recall many of the details, because you won't.  
  9. Get out of the recovery room.  The hallways aren't much of an improvement, but at least your claustrophobia will remain in check for a little longer than if you sit in bed for 3 days. 
  10. Snuggle with Baby when you want to, and leave him in the bassinet when you don't want to.  It's OK to feel like you need a break.

I know from our previous experience that once we arrived home with Baby, everything seemed less scary.  Being in my own bed and having all my normal comforts surrounding me made a huge difference in my mood, my confidence, and ultimately my success with breastfeeding.  I suppose that's my final piece of advice, Future-Sarah.  Remember that in the end, you get to bring that sweet baby home with you.


And if you need a refresher course in how to pack your hospital bag, check out my packing suggestions here!

Wednesday, August 7, 2013

Ruffled Apron

Since the moment I saw that little pink line on our home pregnancy test, I've been crossing my fingers that this baby will be a girl.  I love being a mommy to a boy - Little J is so much fun and, honestly, I know boys (having two younger brothers).  But I am aching to have a child who I can dress in ruffles.  A child who will have dolls that I can dress in ruffles.

Don't get me wrong... I will be thrilled to have a second boy, if that's the case.  I feel so blessed that Little J will have a sibling!  But man, if that sibling comes home from the hospital wearing floral print, I'll be in heaven.

Our "big" ultrasound is coming up in about two weeks, but until then Baby #2's gender will remain a mystery.  So, to keep my girlie hopes in check, I've been making ruffled garments for the little ladies who are already in my life. 

These babies are super simple (but somewhat tedious) to make and only require a little bit of coordinating fabric.  I've made about 6 this year, but still haven't made one for myself for some reason... For the tutorial, click here!


The great thing about these aprons is that they do not require a pattern and can be made in any shape and size. I've even made a couple that include pockets!  These two are 6-year-old-sized.


When I get around to making my own apron, it will be something like this: