Additional disclaimer: Due to updates to the Google+ Picasa Photo Editor, I can no longer add text to my photos. My "Buckley House" branding will be gone for now - until I find a photo editor that I like. Also, due to my frustration with this discovery and my innate stubbornness, I chose to not edit my photos at all (call it a rebellion?) so... they suck. Apologies!
This is by no means a difficult project - I'd say, even with my lame instructions, that it only requires moderate skill. It also requires very little fabric (I always use scraps for most of it).
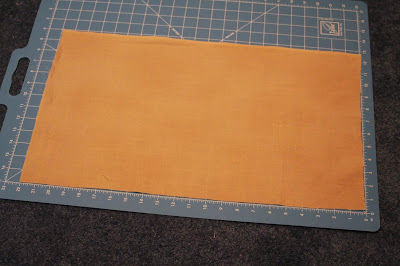
The largest pieces of fabric needed are for the base/back of the apron itself and for the tie (that goes around your waist). My rough dimensions for the base of the apron tend to be about 14 x 22 inches. I typically use a neutral or dark color - this fabric will not really be seen from the front if you add ruffles the whole way up from the bottom. I always hold the fabric up to myself to make sure it covers me from hip to hip and is long enough to keep counter-crud off of my pants.
Hem the edges of this piece of fabric about 1/4 inch (I double hem so that there won't be any risk of fraying edges)
The next thing I do is pick out a few coordinating fabrics for the ruffles. I usually choose 4 fabrics, but it really depends on how tall you want your ruffles to be.
Do some simple math and calculate (adding about 1/2 an inch for hemming and another inch for overlap) how wide the ruffle strips need to be to cover the apron from top to bottom. For example, my apron base ended up being 12 inches tall after I hemmed its edges - in order for 4 ruffle strips to cover this, I cut them to be about 4-4.5 inches wide. (12 inches divided by 4 fabrics = 3 inches each, plus 1.5 inches each for hem/overlap = 4.5 inches)
In order to determine the length of the strips, measure the width of your apron and add "half again more" (a phrase my mom always uses...) so since my apron was about 22 inches wide, I cut my strips to be 33 inches long. (22 divided in half is 11. 22 + 11 = 33). This allows for gathering to create the ruffled appearance.
I didn't take a photo of this part of the process... sorry :(
Next, I hem all the strips 1/4 inch (double hem if you want), but only on three sides, leaving one of the "long" edges raw. This is the edge I will end up gathering, so I simply sew a zigzag down this edge to prevent too much fraying. It could be hemmed, but I'm lazy.
Next, gather that raw edge. My technique for achieving this is to sew a straight stitch the length of the strip using the longest stitch setting my sewing machine will allow (about 4). It will start to gather as you sew, but will probably need to be pulled even more to fit inside the width of the apron, so leave long tails of thread! To gather to the desired length, pull the top thread tails on both ends. (A wonderful tutorial for how to gather can be found here)
Then pin your ruffle to the apron back. I usually start from the middle and work my way to the edges, so it doesn't end up too heavy on either end. I always pin all of my ruffles before sewing any of them down in case I need to do any adjusting.
Overlap the ruffles by about an inch so that the raw edge is well hidden. Then sew them into place!
The hardest step for me is always the waist band. I usually have to piece two lengths of fabric together for this part because it is so long. Measure around the part of your waist where you want the apron to be tied, then double that length (this measurement can be adjusted to your taste, depending on how long you want the ties to be).
Once you have this measurement (let's say it's 60 inches), cut a strip of fabric 3-4 inches wide by 60 inches long. Fold and press the strip in half down the whole 60-inch length ("ugly" sides together) then fold the edges under and press and sew.
(You could also sew the strip "pretty" sides together and turn, but that requires turning 60 inches of fabric inside-out. And trust me, that is not fun).
Once sewn, line up the middle of the waistband with the middle of your apron. The top ruffle should still have a raw edge. Make sure your waistband covers the raw ruffle edge completely and sew onto the front. I always struggle with this part and the technique I use for this step varies from apron to apron (I know, not nice!). The key is to make sure you don't have any raw edges showing, which usually requires sewing along the top and bottom of the waistband. Good luck!
I couldn't really use my pregnant self as a model, so my dresser had the honor of displaying the final product!
To see some of the other aprons I've made, including a couple Kid-Sized ones, check out my previous post here


No comments:
Post a Comment